大家好,我是鸟窝。
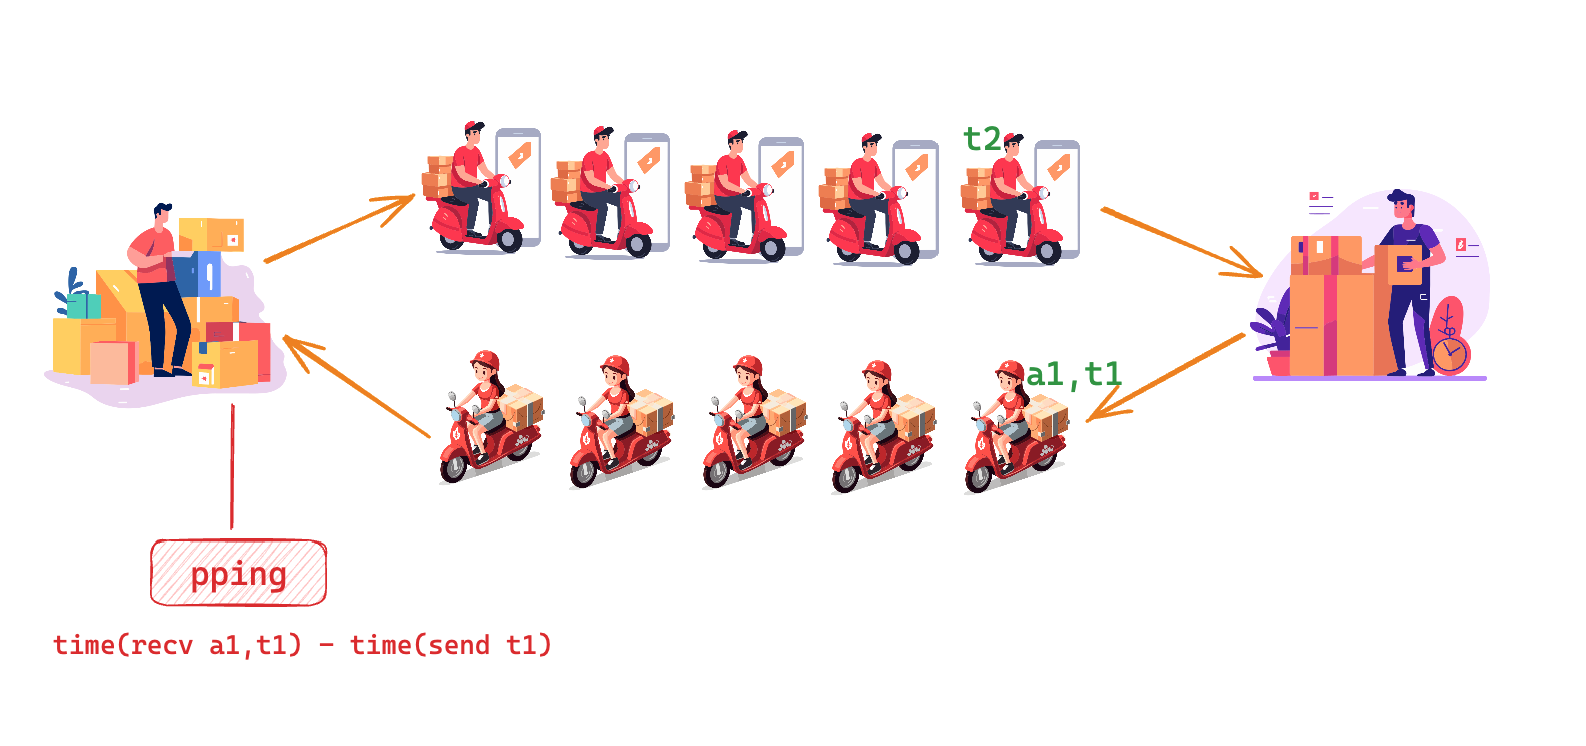
在前一篇“pping:被动式ping,计算网络时延”一篇中,我给大家介绍了 pping 这个工具的原理和使用方法。这篇文章中,我将使用 Go 语言实现 pping 工具。
通过这篇文章,你将了解到:
如何使用gopacket来捕获和解析网络数据包
如何设置捕获时长和过滤捕获的数据包
如何在CGO下静态编译库,如libpcap
了解TCP/IP协议栈的基本知识,如TCP Option
如何进行数据的统计和定时输出和清理
如何使用 pflag 来解析命令行参数
代码在: github.com/smallnest/pping-go
使用libpcap捕获数据包,并进行包过滤 我们并不直接使用libpcap,而是使用封装好的gopacket 。
gopacket是一个用于处理数据包的库,它提供了一个高级的API,可以用来处理数据包的解析、分析和生成。它支持多种数据包格式,包括Ethernet、IPv4、IPv6、TCP、UDP、ICMP等。
我们可以使用gopacket来捕获数据包,然后使用gopacket/layers包来解析数据包的各个部分。
1 2 3 4 5 6 7 8 9 10 11 12 13 14 15 16 inactive, _ := pcap.NewInactiveHandle(*liveInp) defer inactive.CleanUp()inactive.SetSnapLen(snapLen) snif, err = inactive.Activate() if err != nil { fmt.Printf("couldn't open %s: %v\n" , *fname, err) os.Exit(1 ) }
当然你也可以从一个tcpdump这样的工具捕获的pcap文件中解析包:
1 2 3 4 5 6 7 snif, err = pcap.OpenOffline(*fname) if err != nil { fmt.Printf("couldn't open %s: %v\n" , *fname, err) os.Exit(1 ) }
之后设置filter进行包过滤, filter的格式和tcpdump使用的过滤格式一样,默认它会加上TCP,只处理TCP的包:
1 2 snif.SetBPFFilter(filter)
之后处理这个包:
1
2
3
4
5
6
7
8
9
10
11
12
13
14
src := gopacket.NewPacketSource(snif, layers.LayerTypeEthernet) packets := src.Packets() for packet := range packets { processPacket(packet) ...... ...... ......
解析包 从TCP Option中解析时间戳的函数是getTSFromTCPOpts,它的实现如下:
1 2 3 4 5 6 7 8 9 10 11 12 13 func getTSFromTCPOpts (tcp *layers.TCP) uint32 , uint32 ) { var tsval, tsecr uint32 opts := tcp.Options for _, opt := range opts { if opt.OptionType == layers.TCPOptionKindTimestamps && opt.OptionLength == 10 { tsval = binary.BigEndian.Uint32(opt.OptionData[0 :4 ]) tsecr = binary.BigEndian.Uint32(opt.OptionData[4 :8 ]) break } } return tsval, tsecr }
解析IP和TCP包,并从TCP包的Option解析出时间戳:
1 2 3 4 5 6 7 8 9 10 11 12 13 14 15 16 17 18 19 20 21 22 23 24 25 26 27 28 func processPacket (pkt gopacket.Packet) tcpLayer := pkt.Layer(layers.LayerTypeTCP) if tcpLayer == nil { not_tcp++ return } tcp, _ := tcpLayer.(*layers.TCP) tsval, tsecr := getTSFromTCPOpts(tcp) if tsval == 0 || (tsecr == 0 && !tcp.SYN) { no_TS++ return } netLayer := pkt.Layer(layers.LayerTypeIPv4) if netLayer == nil { netLayer = pkt.Layer(layers.LayerTypeIPv6) if netLayer == nil { not_v4or6++ return } }
目前为止我们从包中解析除了IP包和TCP包,接下里我们得到源目IP和源目端口,以及捕获时间:
1 2 3 4 5 6 7 8 9 10 11 12 13 14 15 16 17 18 19 20 21 22 23 24 25 26 27 28 29 30 var ipsStr, ipdStr string if ip, ok := netLayer.(*layers.IPv4); ok { ipsStr = ip.SrcIP.String() ipdStr = ip.DstIP.String() } else { ip := netLayer.(*layers.IPv6) ipsStr = ip.SrcIP.String() ipdStr = ip.DstIP.String() } srcStr := ipsStr + ":" + strconv.Itoa(int (tcp.SrcPort)) dstStr := ipdStr + ":" + strconv.Itoa(int (tcp.DstPort)) captureTime := pkt.Metadata().CaptureInfo.Timestamp if offTm < 0 { offTm = captureTime.Unix() startm = float64 (captureTime.Nanosecond()) * 1e-9 capTm = startm if sumInt > 0 { fmt.Printf("first packet at %s\n" , captureTime.Format(time.UnixDate)) } } else { capTm = float64 (captureTime.Unix()-offTm) + float64 (captureTime.Nanosecond())*1e-9 }
接下来是从全局哈希表flows中查找流,如果没有则创建一个新的流,如果反向流已经存在,则设置反向流。如果反向流不存在,不处理。
1
2
3
4
5
6
7
8
9
10
11
12
13
14
15
16
17
18
19
20
21
22
23
24
25
26
27
fstr := srcStr + "+" + dstStr fr, ok := flows[fstr] if !ok { if flowCnt >= maxFlows { return } fr = &flowRec{ flowname: fstr, min: 1e30 , } flows[fstr] = fr flowCnt++ if _, ok := flows[dstStr+"+" +srcStr]; ok { flows[dstStr+"+" +srcStr].revFlow = true fr.revFlow = true } } fr.last_tm = capTm if !fr.revFlow { uniDir++ return }
既然找到反向流了,说明正向反向的两个packet我们都获取到了了,那么就可以利用两次的捕获时间计算 RTT 了:
1 2 3 4 5 6 7 8 9 10 11 12 13 14 15 16 17 18 19 20 21 22 23 24 25 26 27 28 29 30 31 32 33 34 35 36 37 38 39 40 41 42 43 44 arr_fwd := fr.bytesSnt + float64 (pkt.Metadata().Length) fr.bytesSnt = arr_fwd if !filtLocal || localIP != ipdStr { addTS(fstr+"+" +strconv.FormatUint(uint64 (tsval), 10 ), &tsInfo{capTm, arr_fwd, fr.bytesDep}) } ti := getTS(dstStr + "+" + srcStr + "+" + strconv.FormatUint(uint64 (tsecr), 10 )) if ti != nil && ti.t > 0.0 { t := ti.t rtt := capTm - t if fr.min > rtt { fr.min = rtt } fBytes := ti.fBytes dBytes := ti.dBytes pBytes := arr_fwd - fr.lstBytesSnt fr.lstBytesSnt = arr_fwd flows[dstStr+"+" +srcStr].bytesDep = fBytes if machineReadable { fmt.Printf("%d.%06d %.6f %.6f %.0f %.0f %.0f" , int64 (capTm+float64 (offTm)), int ((capTm-float64 (int64 (capTm)))*1e6 ), rtt, fr.min, fBytes, dBytes, pBytes) } else { fmt.Printf("%s %s %s %s\n" , captureTime.Format("15:04:05" ), fmtTimeDiff(rtt), fmtTimeDiff(fr.min), fstr) } now := clockNow() if now-nextFlush >= 0 { nextFlush = now + flushInt } ti.t = -t } pktCnt++ }
清理过期数据 如果不清理,flows和tsTbl中的数据会越来越多,最终撑爆。
1 2 3 4 5 6 7 8 9 10 11 12 13 14 15 func cleanUp (n float64 ) for k, ti := range tsTbl { if capTm-math.Abs(ti.t) > float64 (tsvalMaxAge)/float64 (time.Second) { delete (tsTbl, k) } } for k, fr := range flows { if n-fr.last_tm > float64 (flowMaxIdle)/float64 (time.Second) { delete (flows, k) flowCnt-- } } }
使用 pflag 解析参数 相对于标准库的 pflag, github.com/spf13/pflag功能更为强大。这里我们使用它解析参数,可以设置短参数和长参数:
1
2
3
4
5
6
7
8
9
10
11
12
13
14
15
16
17
18
19
var ( liveInp = pflag.StringP("interface" , "i" , "" , "interface name" ) fname = pflag.StringP("read" , "r" , "" , "pcap captured file" ) filterOpt = pflag.StringP("filter" , "f" , "" , "pcap filter applied to packets" ) ) func main () pflag.DurationVarP(&sumInt, "sumInt" , "q" , 10 *time.Second, "interval to print summary reports to stderr" ) pflag.BoolVarP(&filtLocal, "showLocal" , "l" , false , "show RTTs through local host applications" ) pflag.DurationVarP(&timeToRun, "seconds" , "s" , 0 *time.Second, "stop after capturing for <num> seconds" ) pflag.IntVarP(&maxPackets, "count" , "c" , 0 , "stop after capturing <num> packets" ) pflag.BoolVarP(&machineReadable, "machine" , "m" , false , "machine readable output" ) pflag.DurationVarP(&tsvalMaxAge, "tsvalMaxAge" , "M" , 10 *time.Second, "max age of an unmatched tsval" ) pflag.DurationVarP(&flowMaxIdle, "flowMaxIdle" , "F" , 300 *time.Second, "flows idle longer than <num> are deleted" ) pflag.Parse() ... }
静态编译 差点忘了。go build来编译我们的程序。
不过如果你使用ldd查看这个程序,你会发现它有很多依赖的动态库:
1
2
3
4
5
6
7
[root@cypress pping]# ldd pping linux-vdso.so.1 => (0x00007ffcf33e1000) libpcap.so.1 => /lib64/libpcap.so.1 (0x00007f4b81933000) libresolv.so.2 => /lib64/libresolv.so.2 (0x00007f4b81719000) libpthread.so.0 => /lib64/libpthread.so.0 (0x00007f4b814fd000) libc.so.6 => /lib64/libc.so.6 (0x00007f4b8112f000) /lib64/ld-linux-x86-64.so.2 (0x00007f4b81b74000)
我们可以采用静态链接的方式,这样编译出来的pping,可以轻松的复制到其他的Linux机器上运行,不需要安装libpcap库。
1
2
3
4
5
6
7
8
9
10
11
12
[root@cypress pping]# go build -ldflags "-linkmode external -extldflags -static" . /tmp/go-link-79680640/000006.o:在函数‘_cgo_97ab22c4dc7b_C2func_getaddrinfo’中: /tmp/go-build/cgo-gcc-prolog:60: 警告:Using 'getaddrinfo' in statically linked applications requires at runtime the shared libraries from the glibc version used for linking //usr/local/lib/libpcap.a(nametoaddr.o):在函数‘pcap_nametoaddr’中: /root/libpcap-1.10.0/./nametoaddr.c:181: 警告:Using 'gethostbyname' in statically linked applications requires at runtime the shared libraries from the glibc version used for linking //usr/local/lib/libpcap.a(nametoaddr.o):在函数‘pcap_nametonetaddr’中: /root/libpcap-1.10.0/./nametoaddr.c:270: 警告:Using 'getnetbyname_r' in statically linked applications requires at runtime the shared libraries from the glibc version used for linking //usr/local/lib/libpcap.a(nametoaddr.o):在函数‘pcap_nametoproto’中: /root/libpcap-1.10.0/./nametoaddr.c:527: 警告:Using 'getprotobyname_r' in statically linked applications requires at runtime the shared libraries from the glibc version used for linking [root@cypress pping]# ldd pping 不是动态可执行文件
它的使用方法和标准库的flag类似。这样我们就能保证和c++的pping工具一样的参数解析了。
基于"Rust重写一切"的哲学,我期望早点能看到大家用Rust实现的 pping。